
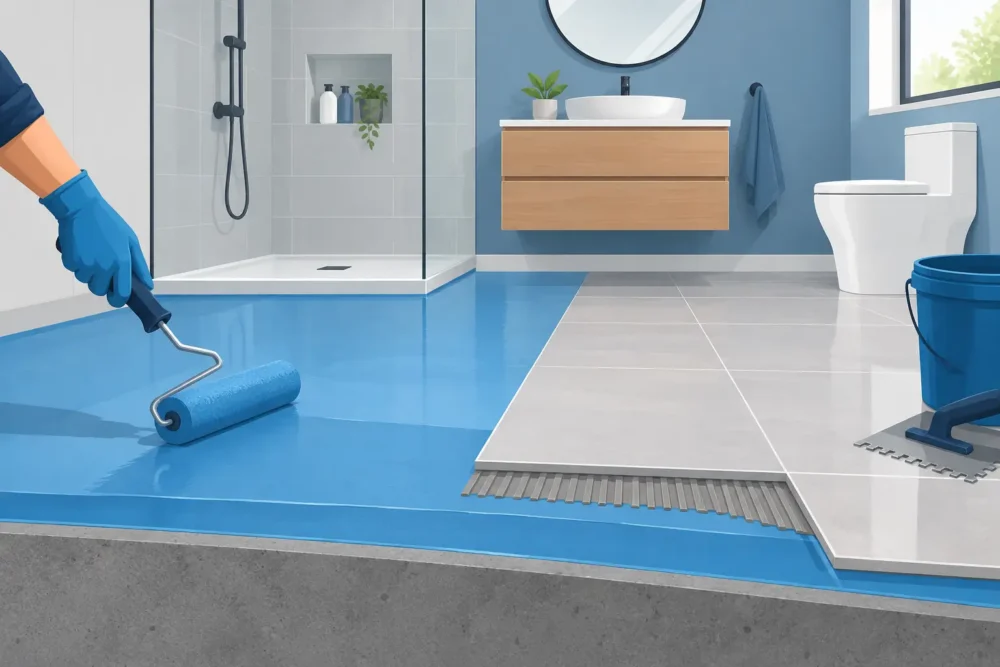
A bathroom floor can look perfectly finished while moisture is quietly working its way beneath the tile. Grout, tile, and caulk are not the waterproofing system. Learning how to waterproof bathroom floors means understanding what belongs below the finished surface, especially around showers, tubs, toilets, and floor transitions where leaks tend to begin.
For Orlando homeowners, this work matters even more in bathrooms that see daily family use, older homes with aging finishes, or renovations that include a walk-in or curbless shower. Proper waterproofing protects the subfloor or slab, helps prevent mold-related moisture problems, and gives your new tile installation the durable foundation it deserves.
Start With the Right Level of Protection
Not every bathroom needs the same waterproofing approach. A powder room with a toilet and vanity may only need limited protection at vulnerable areas. A full bathroom with a tub, shower, or frequent splashing needs more extensive coverage. A wet-room style bathroom or curbless shower requires the most detailed planning because water is expected to reach more of the floor.
For most full bathroom remodels, waterproofing should extend across the main floor, continue up the walls at least several inches, and connect correctly to the shower waterproofing. The goal is to create a continuous barrier that directs water toward the drain instead of allowing it to reach the structure below.
This is also where good planning prevents expensive surprises. If the floor is uneven, damaged, soft, or improperly sloped near the shower, installing a membrane over it will not solve the underlying problem. The surface must be sound before waterproofing begins.
Choose a Waterproofing System Made for Tile
Tile installations typically use either a sheet membrane or a liquid-applied membrane. Both can work well when installed according to the manufacturer’s requirements. The best choice depends on the bathroom layout, the condition of the substrate, the shower design, and the installer’s experience with the system.
Sheet membranes are bonded to the floor with thinset mortar. Their seams, corners, and transitions are sealed with compatible banding or preformed pieces. They offer a consistent thickness and are especially useful around drains, curbs, and floor-to-wall connections.
Liquid-applied membranes are rolled, brushed, or troweled onto the prepared surface. They are practical for rooms with many corners or unusual shapes, but they must be applied at the correct thickness. Applying it too thin, skipping a second coat, or failing to reinforce changes of plane can leave weak spots that are difficult to see once tile is installed.
Avoid treating a basic moisture barrier, paint-on sealer, or extra grout as a substitute for a tile waterproofing system. Those products may have a role in other parts of a home, but they are not designed to manage water beneath a tiled bathroom floor.
Prepare the Floor Before Waterproofing
Waterproofing is only as reliable as the surface beneath it. On a concrete slab, common in Central Florida homes, the floor should be clean, stable, and free of loose material, paint, adhesive, or contaminants that could keep the membrane from bonding. Small cracks may need appropriate treatment, while larger cracks or signs of movement should be evaluated before tile work starts.
Wood subfloors need just as much attention. They must be structurally firm, properly fastened, and flat enough for tile. A floor that flexes can crack grout and tile, then compromise the waterproofed assembly over time. Depending on the project, the installer may use a suitable backer board, uncoupling layer, or approved underlayment before applying the waterproofing system.
Floor flatness is different from shower slope. The main bathroom floor may be level or nearly level, depending on the design. Inside a shower, the substrate needs a consistent slope toward the drain before the waterproofing layer is installed. Water should never be expected to find its way through tile and mortar to a properly sloped surface below.
How to Waterproof Bathroom Floors Step by Step
The exact installation process changes by system, but the sequence should remain deliberate. Rushing through transitions is one of the most common reasons a bathroom develops water damage later.
First, the installer repairs and prepares the floor, then checks that the shower area has the correct slope. Next, the waterproofing membrane is applied across the planned coverage area. It should continue up the walls and wrap carefully at corners, door openings, shower curbs, and plumbing penetrations.
The floor-to-wall joint deserves special attention. Buildings move slightly over time, and this change of plane cannot rely on grout alone. Waterproofing banding or reinforcing fabric helps maintain a continuous barrier across that joint. The same care is needed where the bathroom floor meets the shower floor, especially with a curbless entry.
At the drain, the membrane must connect to a drain assembly designed for the selected waterproofing system. This is not a place to mix materials casually. A properly integrated drain connection is what allows water on the membrane to flow into the drain rather than escape around it.
Once the membrane has cured or been installed as required, it should be inspected before tile goes down. In shower areas, a flood test may be appropriate. The shower is temporarily filled with water and monitored to confirm that the waterproofed pan holds water without leaking. This step takes time, but it is far easier to correct a problem before installing tile, glass, and fixtures.
Do Not Skip the Details That Prevent Leaks
Most bathroom failures happen at transitions, not in the middle of an open floor. A dependable installation accounts for the places where water changes direction or meets another material.
Pay close attention to these areas:
- Shower drains and linear drains, which need compatible waterproofing connections.
- Shower curbs, benches, niches, and corners, where seams must be fully sealed.
- Toilet flange openings, where the floor system should protect the surrounding area without interfering with proper fixture installation.
- Doorways and floor transitions, particularly in bathrooms with curbless showers or adjoining wood flooring.
- Plumbing penetrations at vanities, supply lines, and other locations where gaps can allow moisture below the surface.
Tile layout matters, too. Large-format tile can give a bathroom a clean, modern appearance, but it may not suit every shower floor. Smaller mosaic tile often follows a shower slope more easily and provides additional grout joints for traction. The right choice balances the look you want with drainage, safety, and long-term performance.
Finish the Tilework Correctly
After waterproofing is complete, tile is installed with mortar that is compatible with the tile and substrate. Proper coverage beneath floor tile matters because hollow areas can contribute to cracked tile under normal foot traffic. Spacers, leveling tools, and careful layout help create a professional result, but they do not replace sound preparation below the tile.
Grout fills the joints and supports the finished appearance, yet it is not a waterproof barrier. Even sealed grout can absorb some moisture. Flexible sealant, rather than grout, is generally used at changes of plane, such as where the floor meets the wall or shower curb. This allows for minor movement while helping keep the finished surface clean and protected.
Give mortar, grout, and sealant the required curing time before exposing the bathroom to heavy use. Starting too soon can affect the finish and reduce the performance of the materials.
When Professional Installation Is Worth It
A simple bathroom floor update may seem manageable, but full-floor waterproofing becomes more technical when it connects to a shower, drain, curb, or uneven existing floor. One missed seam can put the work below the tile at risk. The cost of correcting a hidden leak often exceeds the cost of getting the installation details right during the remodel.
An experienced tile contractor can help determine whether your bathroom needs localized protection, a fully waterproofed floor, shower pan replacement, improved drainage, or a larger renovation plan. At Work Tile LLC, our family-owned team helps Orlando homeowners choose practical tile and waterproofing solutions that fit the room, the design, and the budget.
A well-waterproofed bathroom does more than protect your home. It gives you the confidence to enjoy the fresh tile, updated shower, and finished space without wondering what is happening underneath it.