
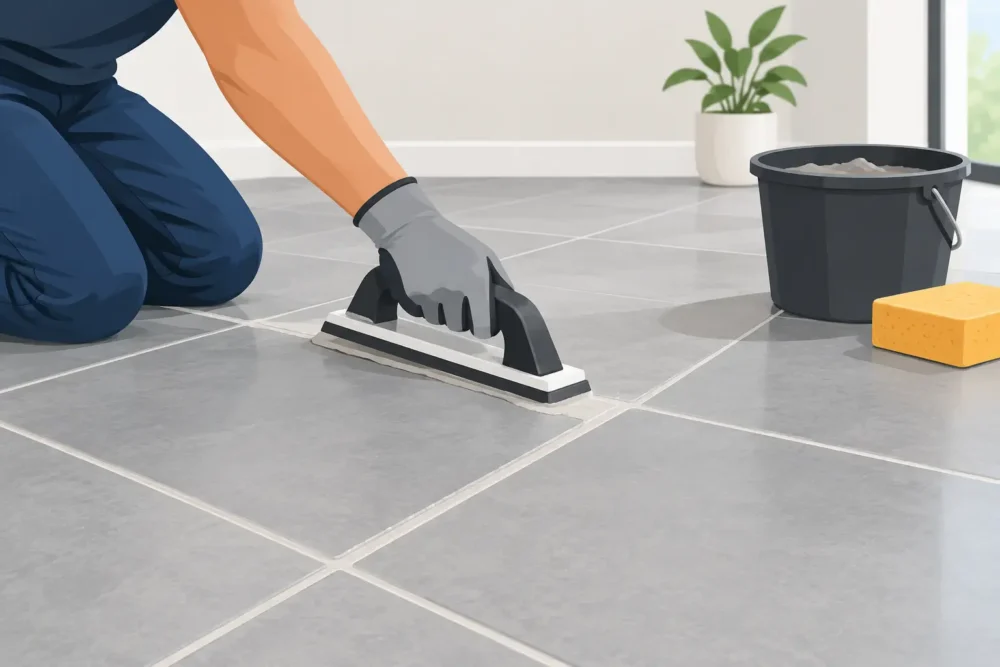
Fresh grout can make a tile floor look finished, clean, and professionally installed. But learning how to grout floor tile is not just a matter of spreading material over the joints. The timing, grout choice, mixing method, and cleanup all affect whether the floor has crisp lines or a cloudy, uneven finish that needs to be repaired later.
For Orlando homeowners, grout selection matters even more in bathrooms, laundry rooms, entryways, and other spaces exposed to moisture, humidity, and regular cleaning. Taking a little extra care at this stage protects the investment you made in new tile.
Start With a Floor That Is Ready for Grout
Do not grout as soon as the last tile is set. The thinset underneath the tile needs time to cure so the tiles do not shift when you press grout into the joints. Most installations need at least 24 hours, but the mortar manufacturer’s instructions should always control the schedule. Larger-format tile, cool rooms, and certain setting materials may require more time.
Before opening the grout, remove every tile spacer and inspect the joints. Thinset squeezed up between tiles should be scraped out so the grout can fill the joint to a consistent depth. A utility knife, grout saw, or small hand tool works well, but be careful not to chip the tile edges.
Vacuum the floor thoroughly. Dust, loose thinset, pet hair, and debris can weaken the grout bond or leave small dark spots in light-colored grout. The joints should be clean and dry, and the tile surface should be free from adhesive residue.
If you installed natural stone, polished porcelain, or textured tile, check whether it needs a grout release or sealer before grouting. Some materials can hold pigment in their pores or surface texture. A small test area is worth the time, especially with dark grout on light tile or light grout on dark tile.
Choose the Right Grout for the Room
The grout aisle can be confusing because the best option depends on joint width, tile type, traffic, and maintenance expectations. Cement-based grout remains a practical choice for many residential floors. It is widely available, comes in many colors, and provides a traditional look when mixed and installed correctly.
Sanded grout is commonly used for wider floor-tile joints because the sand helps limit shrinkage. Unsanded grout is generally used for narrow joints and can be a better fit for delicate polished surfaces that could scratch. Many modern products are labeled as all-in-one or high-performance grouts and can work across a wider range of joint sizes, but read the label rather than assuming one product fits every tile.
Epoxy grout offers exceptional stain and moisture resistance, which can be appealing in showers, busy bathrooms, or homes with kids and pets. The trade-off is that it sets quickly and is less forgiving for a first-time installer. It also costs more and requires close attention to the manufacturer’s cleanup directions.
Color deserves as much consideration as material. Matching grout to the tile creates a quieter, more continuous look. A contrasting color makes the tile pattern stand out but also makes uneven spacing and lippage more noticeable. On a floor that sees heavy use, medium gray, warm taupe, and other mid-tone colors often hide everyday dust better than bright white.
Tools You Need Before You Mix
Set up everything before mixing grout. Once grout reaches the right consistency, you do not want to leave it sitting in the bucket while you search for a sponge. You will need a rubber grout float, a clean mixing bucket, a margin trowel, clean water, two buckets for rinse water, and several quality grout sponges.
Keep microfiber towels or clean cotton rags nearby for final haze removal. Knee pads are also a smart investment for floor work. They make it easier to maintain steady pressure with the float without rushing through the job.
For a small area, mixing by hand is usually enough. For larger floors, a low-speed drill with a grout mixing paddle can save effort, but do not whip air into the material by mixing too fast. Follow the exact water ratio on the bag. Adding extra water may make grout easier to spread at first, but it can weaken the finished joints, cause uneven color, and increase shrinkage.
How to Grout Floor Tile Step by Step
Mix only the amount of grout you can apply and clean within the product’s working time. Start with a small section, usually about 10 to 20 square feet, until you understand how quickly the grout is setting in your room.
Add the measured water to the bucket first, then add grout powder gradually. Mix until it reaches a smooth, peanut-butter-like consistency with no dry pockets. Let it rest for the period listed by the manufacturer, often called slaking, then remix without adding more water.
Use the rubber float to spread grout diagonally across the tile joints. Hold the float at roughly a 45-degree angle and press firmly so the grout fills each joint from bottom to top. Diagonal passes help prevent the edge of the float from digging into a fresh joint and pulling grout back out.
After filling the joints, hold the float closer to 90 degrees and scrape excess grout off the face of the tile. Again, work diagonally. You are not trying to make the tile perfectly clean yet. The goal is to leave full joints while removing as much excess as possible before sponging.
Wait only as long as the grout instructions recommend before beginning the first wash. In a warm Orlando home, grout can firm up faster than expected, especially if air conditioning is off or sunlight is hitting the floor. A grout sponge should be damp, not dripping. Wring it out well, wipe lightly in a diagonal direction, and rinse frequently in clean water.
Avoid over-washing. Too much water or aggressive scrubbing can pull grout from the joints, leave low spots, and create blotchy color after curing. Make one or two gentle passes, then let the section sit while you move to the next area. Return later for a second light wash if needed.
Shape the Joints Before They Harden
As you clean, look closely at the grout lines from more than one angle. Joints should be full and consistent, usually sitting slightly below the tile edges. If a joint looks pinched, hollow, or low, add a little more grout while the material is still workable.
Corners, walls, tubs, cabinets, and other changes of plane should not be filled with rigid grout. These areas move differently from the tile field and are usually finished with a flexible, color-matched sealant. Grouting those joints can lead to cracking as the home settles or materials expand and contract.
This is one place where a careful tile installer makes a visible difference. Clean, even joints make tile look intentional. Uneven grout lines can distract from even the most beautiful porcelain, ceramic, or natural stone floor.
Remove Haze Without Damaging the Finish
A dull film on the tile is normal after grouting. Once the remaining residue has dried to a light haze, buff the surface with a clean, dry microfiber cloth. Work in small sections and change cloths as they become coated.
Do not reach for acidic cleaners or harsh chemicals right away. Fresh cement grout needs time to cure, and the wrong cleaner can discolor grout or damage certain tile finishes. If stubborn haze remains after the grout has cured for the manufacturer’s recommended period, use a cleaner approved for your specific tile and grout type.
Pay close attention to textured tile, wood-look plank tile, and matte finishes. These surfaces can hold residue in small grooves, so they may need a few extra passes with a microfiber towel. The goal is a clean tile face without scraping or soaking the new grout.
Let the Grout Cure Before Regular Use
The floor may look dry within hours, but it is not ready for normal traffic or wet cleaning. Follow the product directions for curing time. Many grouts can handle careful foot traffic after about 24 hours, while heavy furniture, rugs, mopping, and standing water should wait longer.
Keep the area protected from wet shoes, pets, and dropped items during the early cure period. In bathrooms, avoid shower overspray and do not wash the floor until the grout has had the recommended time to harden. Good ventilation helps, but do not use extreme heat to force the process.
Some cement-based grouts benefit from a penetrating grout sealer once fully cured. Sealer helps resist stains and makes routine cleaning easier, but it is not a substitute for proper installation or regular maintenance. Many high-performance and epoxy grouts do not require sealing, so always confirm what your specific product needs.
When It Makes Sense to Call a Tile Professional
Grouting a small, simple floor can be a manageable weekend project. It becomes more demanding when the tile has tight patterns, very wide joints, natural stone, a large open layout, or uneven surfaces that need careful correction. Bathrooms also introduce details around toilets, vanities, shower entrances, and waterproofing transitions that deserve experienced attention.
At Work Tile LLC, we help Orlando-area homeowners make practical tile decisions that hold up beautifully in real homes. Whether you are refreshing a dated bathroom floor or planning a full renovation, professional preparation and finishing work can turn new tile into a space you are proud to use every day.
A well-grouted floor should not call attention to the grout itself. It should make the tile feel clean, secure, and complete – the kind of finished detail that makes an ordinary room feel extraordinary.